
Travel is my comfort food. It is a superb blend of flavors, sights and sounds that soothe my soul.
My first experience of Italy was a love affair of food, art and culture. The rich texture of Italy is woven into their handmade pastas; their astonishing collection of priceless artworks; their inherent sense of style; their joie de vivre and their mouthwatering cuisine.
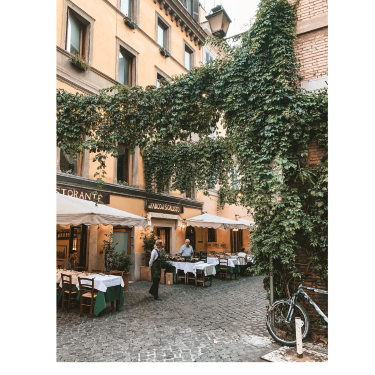
My most treasured memories are of long lunches spent on the cobbled streets, watching how Italians cook and savouring the many courses of authentic and wholesome dishes, packed with fresh ingredients and lovingly made in age old traditional methods.
As much as I try to avoid carbs, my big weakness is the variety of breads on offer - pizza, bruschetta, focaccia - all loved the world over. They are enjoyed as an antipasto, appetizer, table bread, snack or even as a main meal. The distinctive feature of Italian foods is simplicity and simple fresh ingredients, combined to create unique meals, and this is true, even of their breads.
But the Italians are not only famous for their mouthwatering cuisine. They have an impressive history of creative genius. Artists like Giotto, Donatello, Brunelleschi, Michelangelo, Leonardo da Vinci, Titian, Bernini, and Tiepolo all hail from Italy. There are standout masterpieces that those who appreciate fine art must see when in Italy; Raphael’s Frescoes, Michelangelo’s Moses, Byzantine mosaics by Pietro Cavallini, Bernini’s artistry in the Ecstasy of Saint Theresa statue are just the tip of the iceberg.
As one does while you’re in lockdown, I drew inspiration from my travel journals to share my experience of Italy with my family and challenged myself to use whatever I had in the refrigerator to create an edible masterpiece! My favourite Italian food is focaccia so I opted for a simple focaccia that is a celebration of edible colours perfectly placed, both to inspire and enjoy with all the senses.
Best enjoyed with a chilled glass of Prosecco, lots of sunshine and good company! A lot like Italy!
VAN DOUGH FOCCACCIA BREAD ART
Recipe adapted from Teri Culletto (Vineyard Baker)
Makes approximately 1 large 10x14 or two medium 9x6 inches
Total time: 2.5 hours
“Van dough” ingredients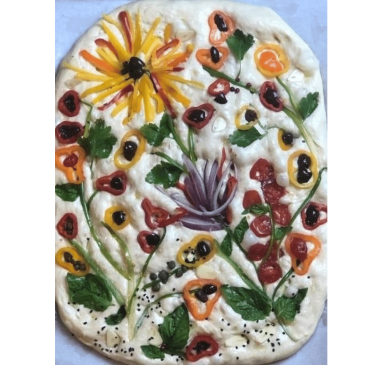
- 350g gluten free all-purpose flour
- 2 tsp baking powder
- 2 ¼ teaspoons instant yeast
- 1 Tbsp sugar
- 1 tsp salt
- 4 Tbsp olive oil, divided
- 1 1/2 cups lukewarm water
- 3 tbs olive oil
Expressionist toppings
- Olive oil, salt, pepper, garlic, parmesan cheese
- Little sweet peppers make great flowers
- Olives provide black and purple color
- Fresh Chives or scallions for stems, basil or parsley for leaves
- Capers, small grape tomatoes, red onion, nuts cooked beans and seeds all add beautiful color to your pallet.
Remember, you are only limited to your imagination. Look at life through an edible lens. A walk in the woods, visit to a museum or just a walk through the grocery store or farmer’s market provides wonderful inspiration.
INSTRUCTIONS
- In a large bowl, mix flour, salt, and baking powder. Set aside.
- Place the lukewarm water, olive oil, yeast, sugar and about 1 cup of the dry mixture into a small bowl. Stir to combine; a few lumps are OK. Set aside for 30 minutes or so, until the mixture is bubbly and smells yeasty.
- Add this mixture to the dry ingredients and beat on medium-high speed for 4 minutes. The mixture will be thick and sticky, but not elastic; it won't feel like regular yeast dough. Note: you must use an electric mixer to make this dough; mixing by hand doesn't do a thorough enough job.
- Cover the bowl with plastic wrap or a clean dish towel and set it to rise in a warm place for at least 30 minutes if using rapid rise yeast and about an hour if you use regular yeast. The batter/dough will be roughly double in size.
- During the last few minutes of the rise time, preheat the oven to 200 degrees Celsius
- Line a baking sheet with parchment paper. Use non-stick vegetable oil spray to lightly grease a 9" x 13" pan, or two 9" round pans. Drizzle the 2 tablespoons olive oil atop the spray in the 9" x 13" pan; or use 1 tablespoon of the oil in each of the 9" pans. The spray keeps the bread from sticking, while the olive oil gives the bottom crust great crunch and flavour.
- Pour the batter out onto the prepared baking sheet and gently press out using your fingers or the back of a spatula into a rectangle shape (roughly 8×10″ or so) about 3/4 of an inch thick.
- Using your wet fingers, start at the center of the dough and work outwards towards the edges, pressing the dough to fill the bottom of the pan.
- Place your herbs and veggies gently in your chosen pattern on the top of your focaccia dough. When you are satisfied with your artwork and everything is picture perfect, go back and press some of the veggies in so the dough is hugging them a bit.
- Bake for 25-30 minutes until it's set, and the top springs back when pressed.
- Remove the focaccia from the oven, and immediately turn it out of the pan onto a cooling rack. It will be pale on top, golden brown on the bottom. It is best to wait 5 minutes before cutting the focaccia.
BAKING TIPS
GLUTEN FREE DOUGH IS MORE LIKE BATTER. Gluten-free “dough” has a more batter-like consistency than traditional wheat-based doughs. By batter-like, I mean the mix is a sticky, wet batter instead of stretchy and pliable dough. This is because there are no gluten proteins to give it structure. The best part about this is that you don’t have to knead the focaccia dough, because you can’t! Different flour blends will produce different results, so you may have to experiment.
DON’T SKIMP ON THE OLIVE OIL. It may feel like you are using a lot of oil, but the olive oil is essential for the texture of the gluten-free focaccia. Olive oil helps give that gorgeous crispy crust while it locks in the light airy interior of the bread.
THE TOUCH TEST. You need warmth to activate yeast, but before you add the yeast, do a touch test. If the water is too warm to put your finger in comfortably for several seconds, it is too hot. Let it cool to a comfortable temperature and then add the yeast.
USE A BAKING SHEET ON YOUR PAN. A surefire way to keep your dough from sticking to the pan is to use baking paper, then drizzle the olive oil on top of it.
